
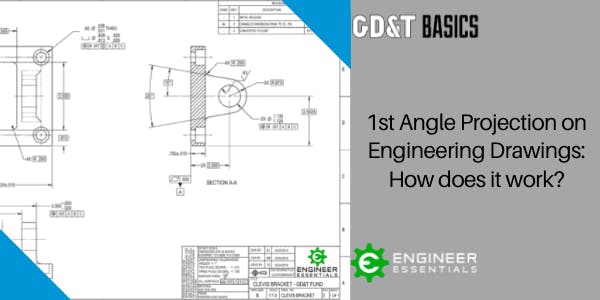
This post is in response to a question that we received on our question line from Gilroy. Gilroy asked us about the drawing projection method in an example problem that was a part of our Print Reading and Tolerances course, formerly known as Engineering Drawing Basics. The drawing, questions, and solution to this example are shown in a markup provided by Gilroy below.
The first question in our example problem asks if the drawing uses first angle projection or third angle projection. Note that the drawing title block contains a symbol showing the top view and side view of a cone. This symbol indicates the projection method used in the drawing.
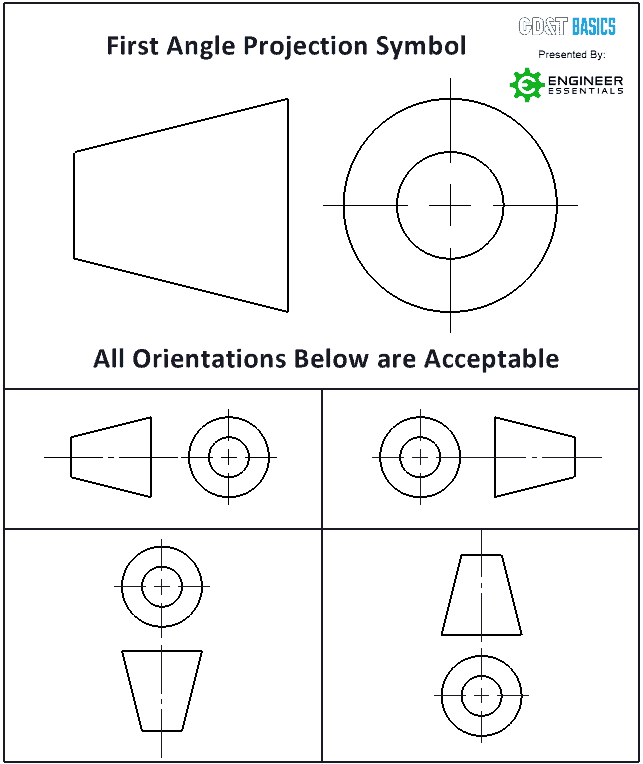
First Angle Projection Symbol
When the large end of the cone in the section view is closest to the top view, this is known as first angle projection. Traditionally, the first angle projection symbol is drawn with the top view on the left and the side view on the right. However, this is not always the case, so it is essential to note the larger end of the cone’s location relative to the top view.
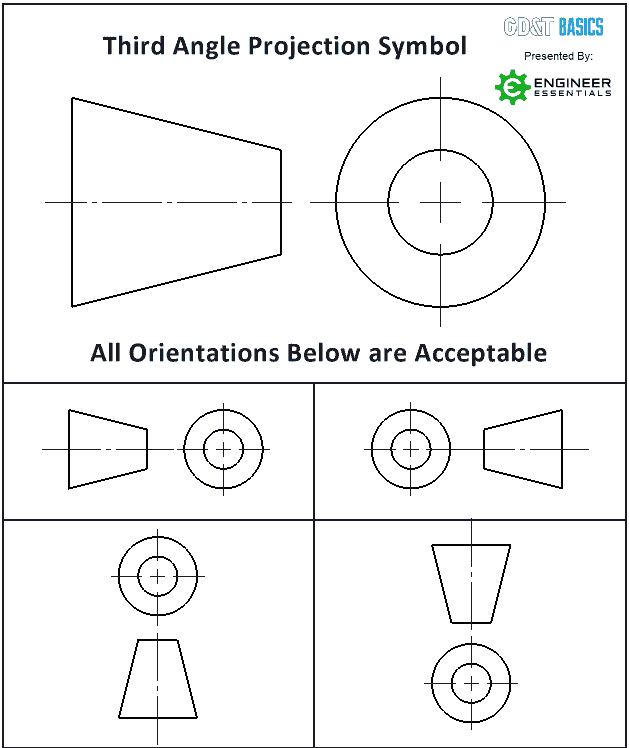
Third Angle Projection Symbol
The symbol for third angle projection is similar, but the narrow end of the cone in the side view is closest to the top view. In the past, it was regarded as a best practice to draw the third angle projection symbol with the top view of the cone on the right and the section view on the left. Again, the convention is not always followed, so it is important to note the location of the smaller end of the cone relative to the top view.
Visualizing Third Angle Projection (Most Common in US):
One way to visualize projections is the bowl method. For the third angle projection, we envision ourselves looking down on a bowl containing the part we are drawing. To see the view that should be shown on the left side of the drawing, we slide the part to the left, up the side of the bowl. For the part shown in the illustrations below, the view on the drawing’s left side will be a simple rectangle.
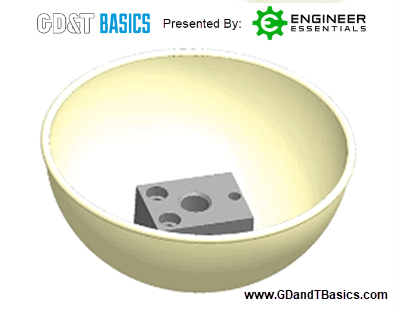
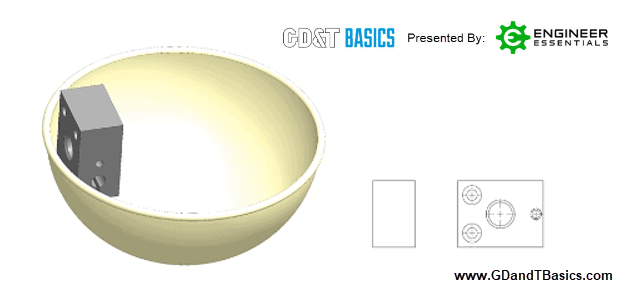
Continue this method, visualizing the part sliding to the right, top, and bottom. When looking down on the bowl, the view seen will be drawn in the corresponding position on the drawing. Remember that the part is inside the bowl for third angle projection. This method is used most often in the United States and Canada.
Visualizing First Angle Projection (Most Common outside of US/ISO Prints):
In other parts of the world, the first angle projection is more commonly used. To visualize the drawing views for first angle projection, we flip the bowl upside-down to make a dome and picture the part on top of it. To see the view that should be shown on the left side of the drawing, we slide the part to the left, down the side of the bowl. For the part shown in the illustrations below, the view on the left side of the drawing will be a rectangle with a slot cut into it.

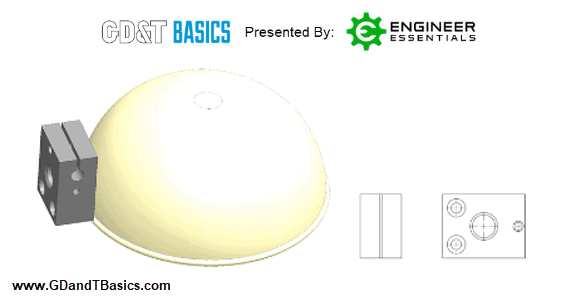
Continue this method, visualizing the part sliding to the right, top, and bottom. When looking down on the bowl, the view seen will be drawn in the corresponding position on the drawing. Remember that the part is on top of the bowl for first angle projection.
Drawing Projection Key Points:
- When reading the drawing orientation symbol, it is most important to note if the large or small end of the cone is nearest to the top view
- Large end of the cone nearest to the top view indicates the symbol for first angle projection.
- Small end of the cone nearest to the top view indicates the symbol for third angle projection.
- To visualize a third-angle projection (US & Canada), think of a part inside a bowl.
- To visualize a first angle projection (outside US & Canada), think of a part on top of a bowl.
Thanks for checking out our video and article. Watch for more question and answer videos coming soon. Also, keep in mind that our team here at GD&T Basics is ready to help with any questions or training needs that you may have. Please don’t hesitate to reach out to us by clicking the link below
Looking for a handy chart to help you with orthographic views?
Download our FREE orthographic views wall chart today.
Download FREE Wall Chart